My drawers are a bit messy, with pens, markers, coins, clipper... flying around. Time to sort things out. I've been searching for cheap/free storing ideas, until I find Origami Box, which is cheap, almost free to make, and looks fabulous in drawers.
Aha, exactly what I need!
You can even serve snacks & edamames in these cute boxes at a party. No dish clean, just toss.
Here is the step by step instruction.
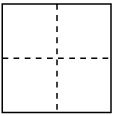 | 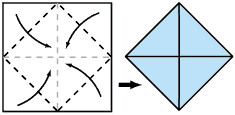 | |
| 1. Start with a square piece of paper (6 *6 inches). Fold the paper in half horizontally and then verically, so the creases look like this. | 2. Fold the four corners of the paper toward the center point | |
 |  | 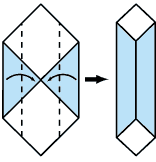 |
| 3. Fold the top and bottom of this square into the center and open out again to create these creases. | 4. Open out the top and bottom triangular flaps. | 5. Fold the sides of the model into the centre, creasing well. |
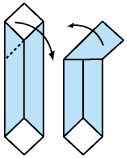 | 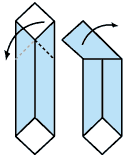 | |
| 6. Fold down top corner of model and then open out again. | 7. Fold down model in the other direction | You should now have 2 new diagonal creases like this. |
 | 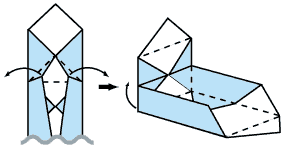 | |
| 8. Repeat step 6 & 7 at the other end of the model, so you have the new creases at both ends. | 9. At one end of the model,Open out model along the creases you just made. This will raise the top portion of the model vertically. | |
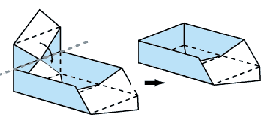 |  | |
| 10. Fold top of model over into the box. Its taking shape! | 11. Repeat Step 9 and 10 at the other end of the box... and its finished! To make a lid, just make another box, but start with a slightly bigger piece of paper. |
For more origami ideas, click on Origami Fun.


No comments:
Post a Comment